QNAP Customized Node
QDashboard: This node provides a Live Data API endpoint. This API can be used by any third party Application or Dashboard to receive the data transmitted by this node.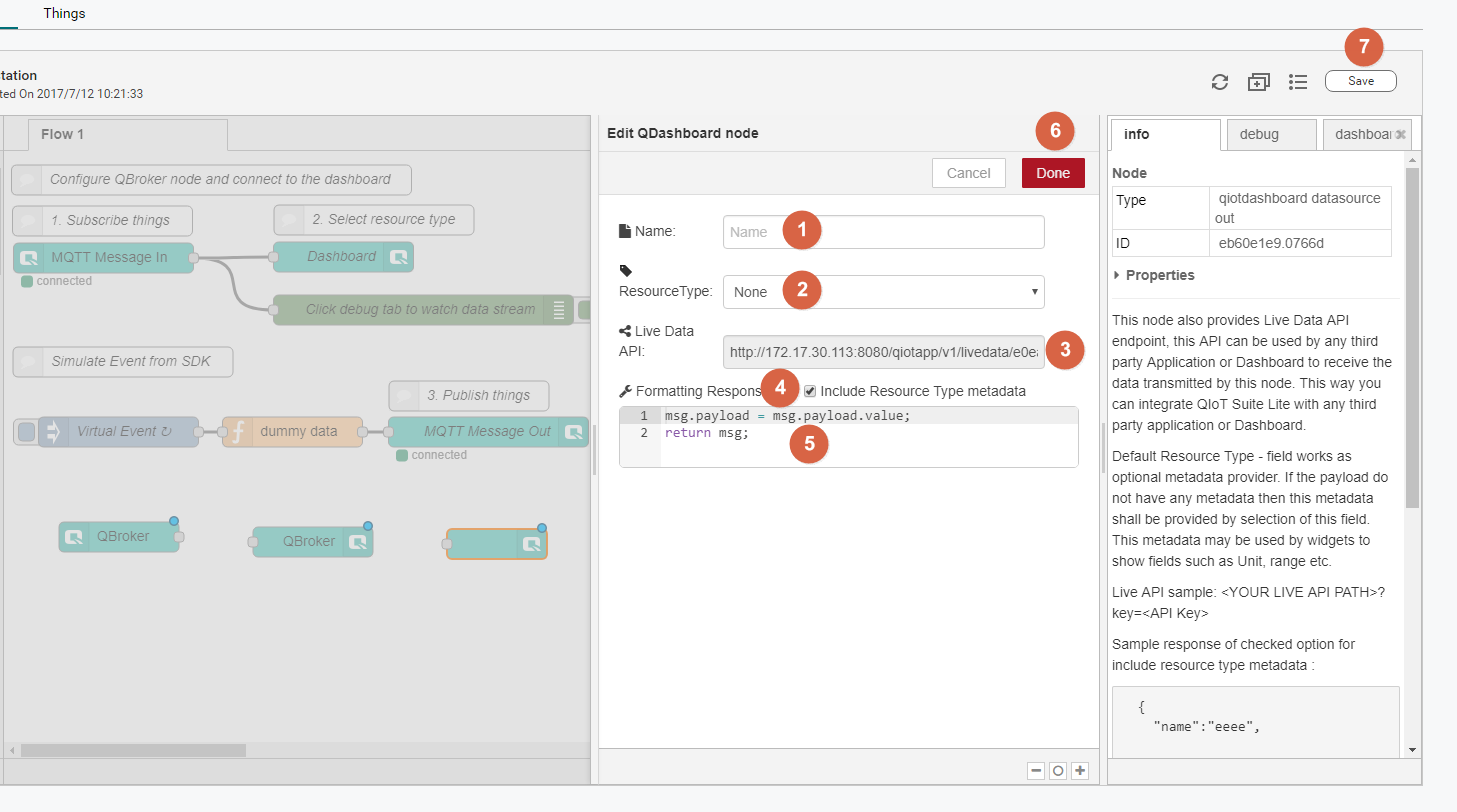
- Enter the node name
- Select the Resource type
- Live Data API (can be used for external services to access information in the dashboard)
- Check the imported Resource type data attributes (checked by default)
- Format the imported dashboard data (keep default) ( If you use the default format data, the data to be transmitted must be placed in msg.payload.value)
- Click the Done button to save the settings
- Click the Save button to deploy the node
QBroker In: This node receives Thing data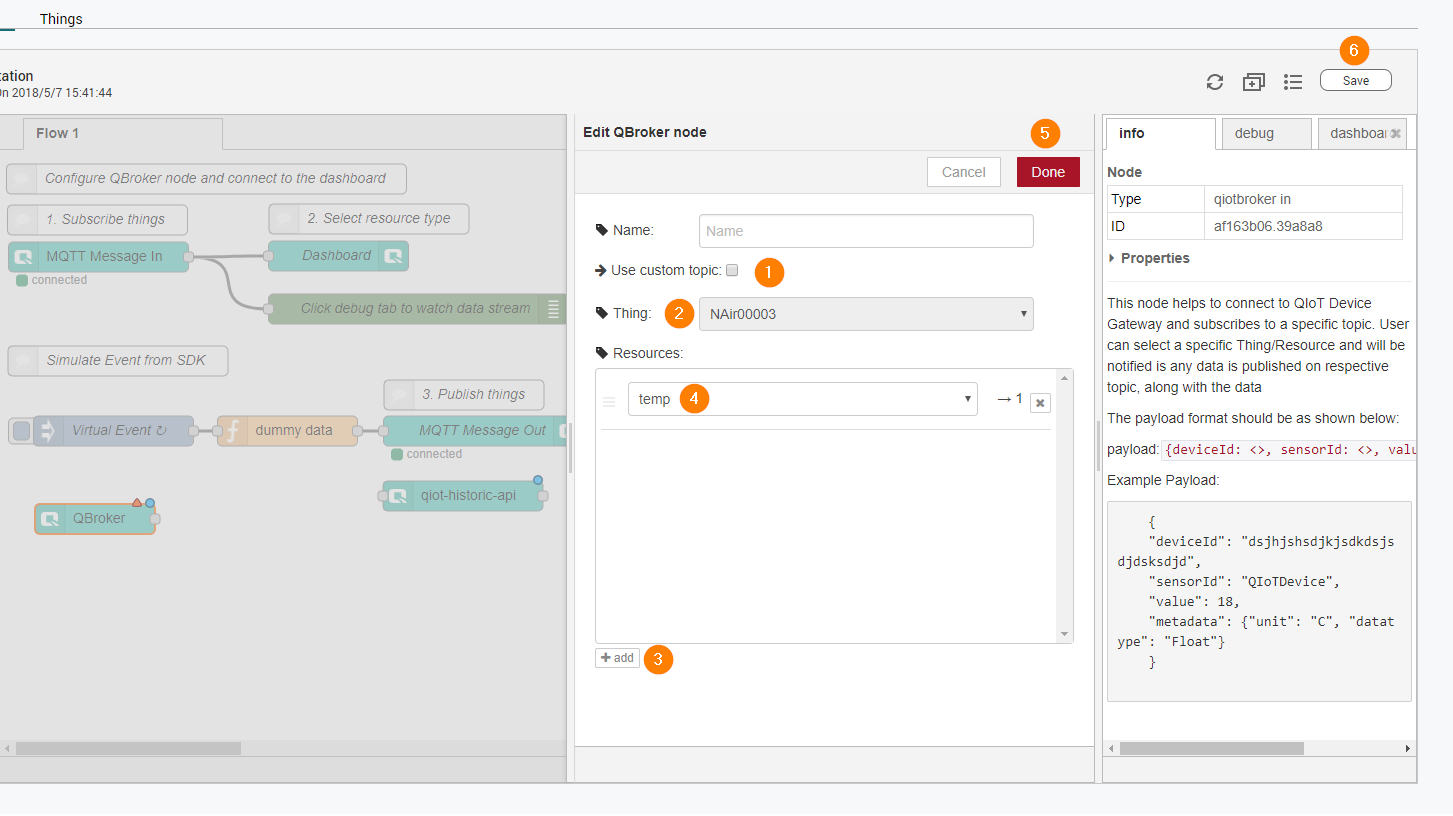
- Deselect Use custom topic option
- Select Thing
- Add Resource
- Select Resource
- Click "Done" to save the settings
- Click "Save" to deploy the node
QBroker Out: This node transmits Thing data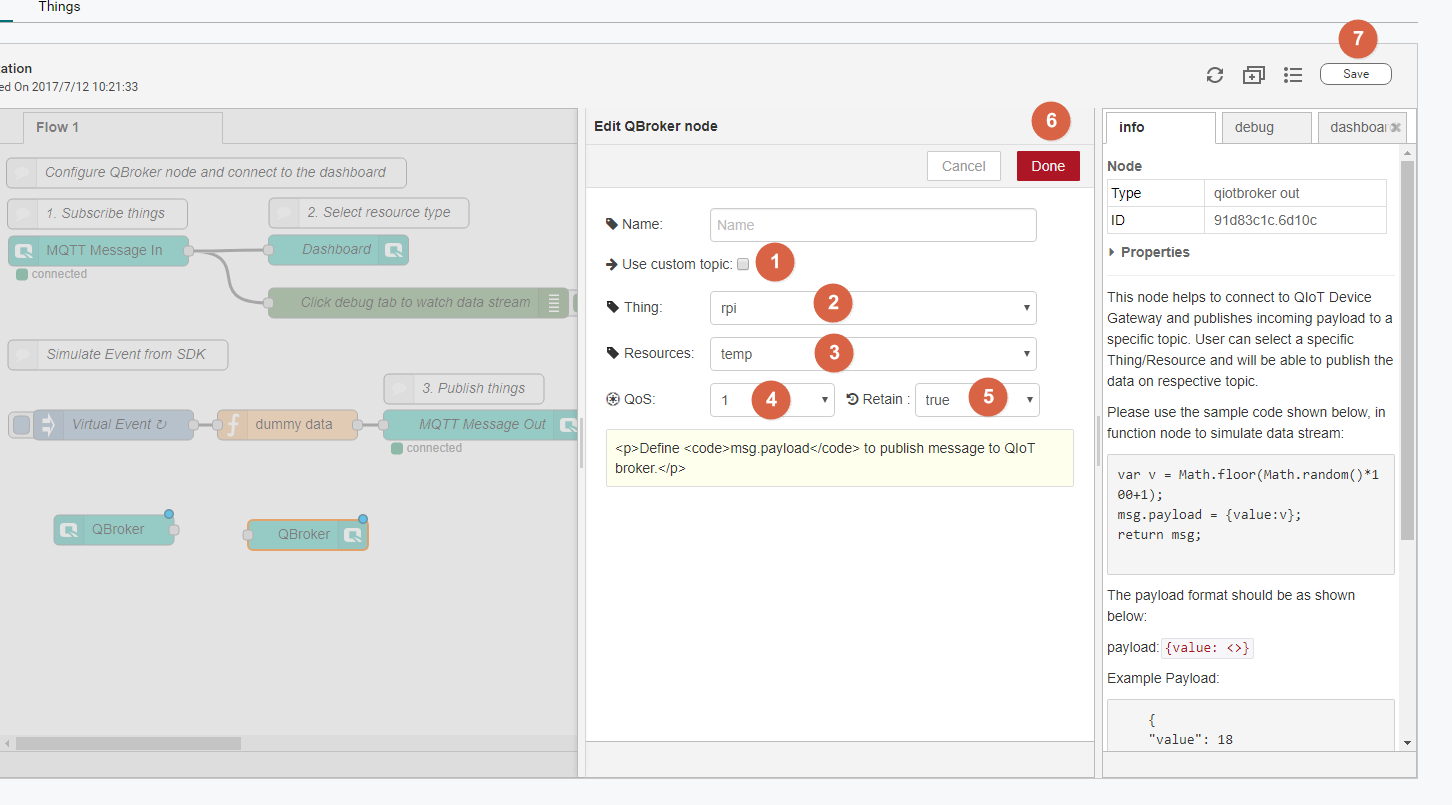
- Deselect Use custom topic option
- Select Thing
- Select Resource
- QoS settings
- A QoS setting of 0 will reduce data reliability. It is recommended to set to 1 or 2
- 0:at most once
- 1:at least once
- 2:exactly once
For more information, please refer to: https://www.ibm.com/support/knowledgecenter/en/SSFKSJ9.0.0/com.ibm.mq.dev.doc/q029090.htm
- Retain settings True:MQTT Broker will retain messages in this Topic. If you have a new subscriber, or if the previously-disconnected subscriber is reconnected, they will receive the last retained message (this option must be true if HTTP, HTTPS, and CoAP protocols are used to received data) False:MQTT Broker will "not" retain messages in this Topic. If you have a new subscriber, or if the previously-disconnected subscriber is reconnected, they will not be able to receive the last message
- Click the Done button to save the settings
- Click the Save button to deploy the node
QHistoricData: This node retrieves the maximum, minimum, and average value stored in the Database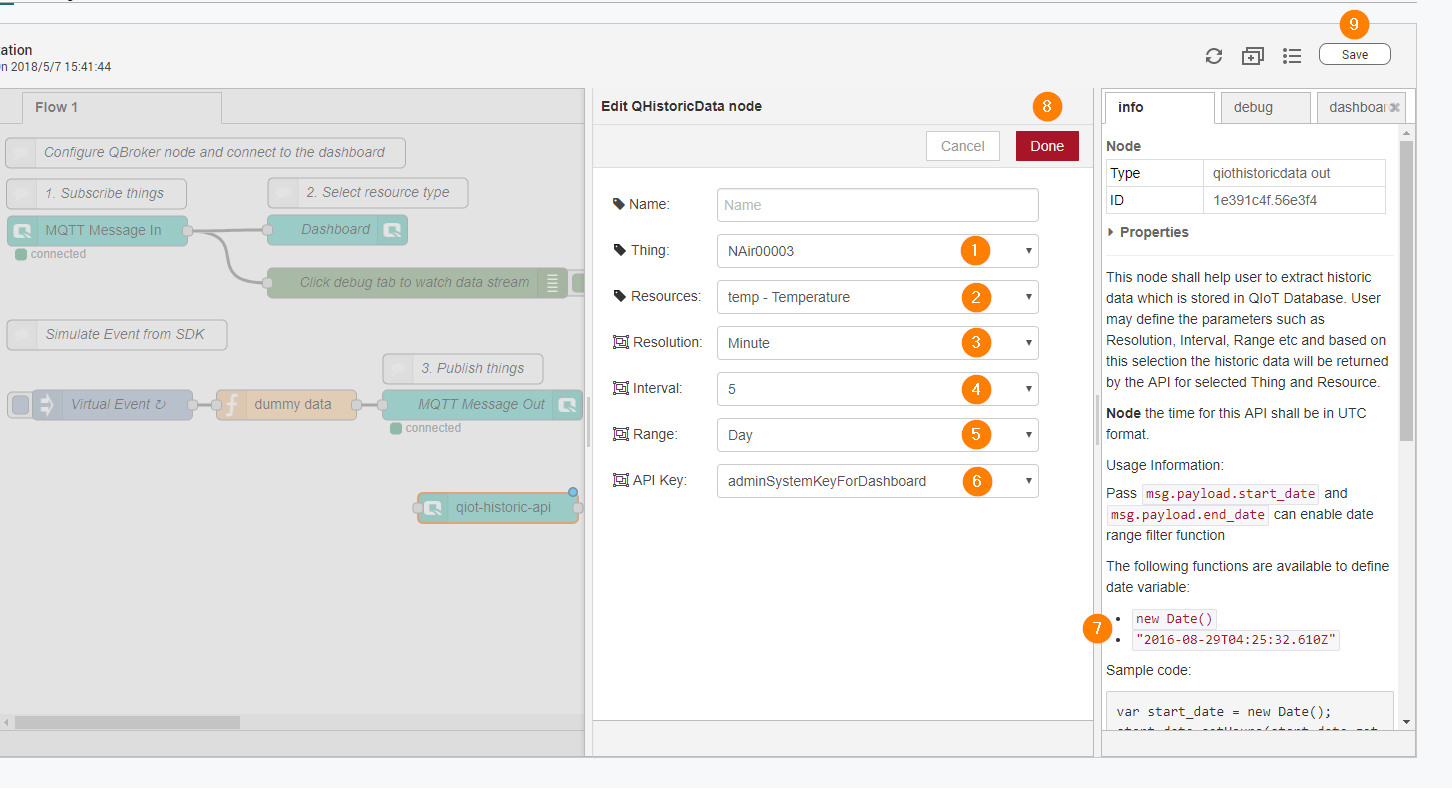
- Select Thing
- Select Resource
- Select the resolution
- Select the interval
- Select the range
- Select the API Key
- Read the sample code to learn how to use date range query
- Click the Done button to save the settings
- Click the Save button to deploy the node