Quick Setup Wizard
The Quick Setup Wizard can help you quickly create IoT application services and push the sample code, device configurations, MQTTS connection profile and SSL certificate key to your device
Step 1: Click “Quick Setup Wizard” in the top-right corner.

Step 2: Create a new IoT application
This step creates an IoT application that contains Things, Rule and Dashboard. An IoT application is made up of a single rule, a single dashboard and multiple Things.
You can enter the IoT application name and description below, and the rule through the dashboard

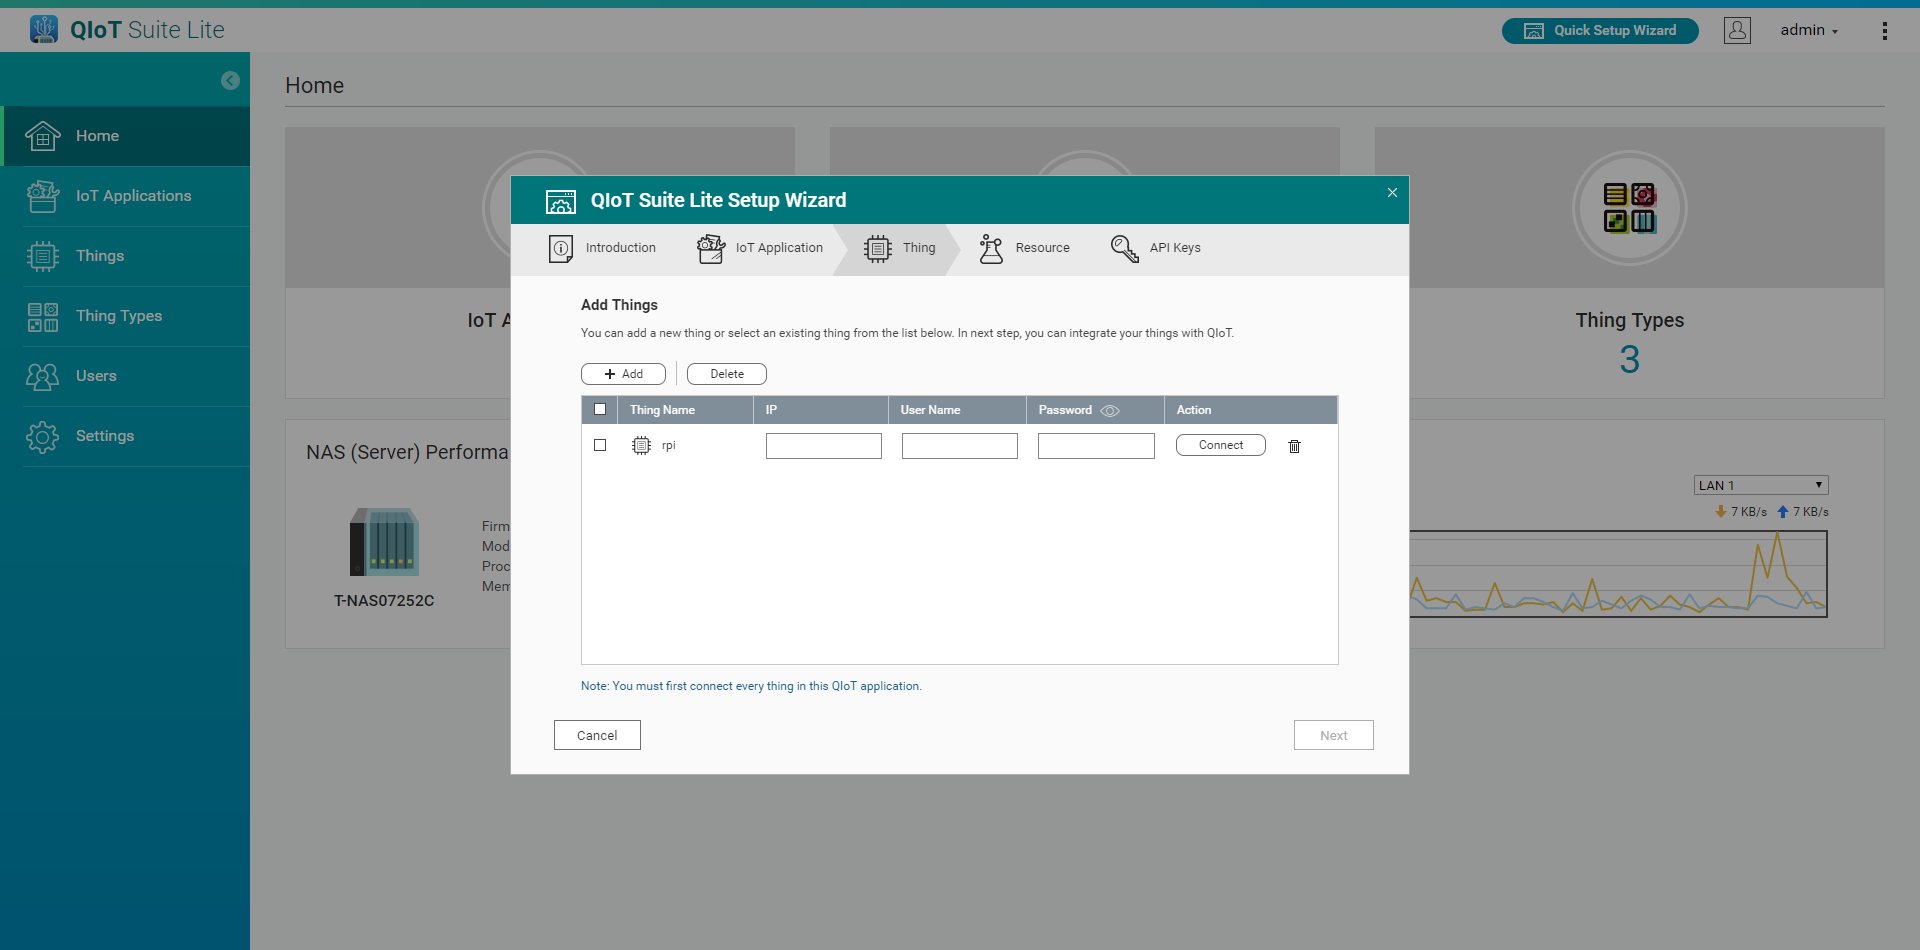
Step 3: Add Thing
This step creates a Thing, or your device source

Click Add, you can select from existing Things or create a new Thing
- Thing name: Enter the name
- Description: Enter description
- Thing type: Select the Thing's category from the following options. Each category is described below:
- QIoT Supported: This is a board/device that is fully supported and tested for compatibility with QIoT Suite Lite. QIoT-supported Things have pre-defined Thing type attributes and will push the sample code suitable for the current Thing to the device. (Arduino Yun:”Python”、Raspberry Pi:”Node.js”、Inetl Edison:”Node.js”)
- Custom: Differs from QIoT supported device types. Custom means custom development board/device types.
- Attributes (optional): Use the Thing attributes to describe the device's identification and functionality. Each attribute is a key-value pair.

Once finished adding, enter the IP, Username and Password of the Thing and click Connect to test the connection between the QIoTs. Proceed to the next step after successful connection.
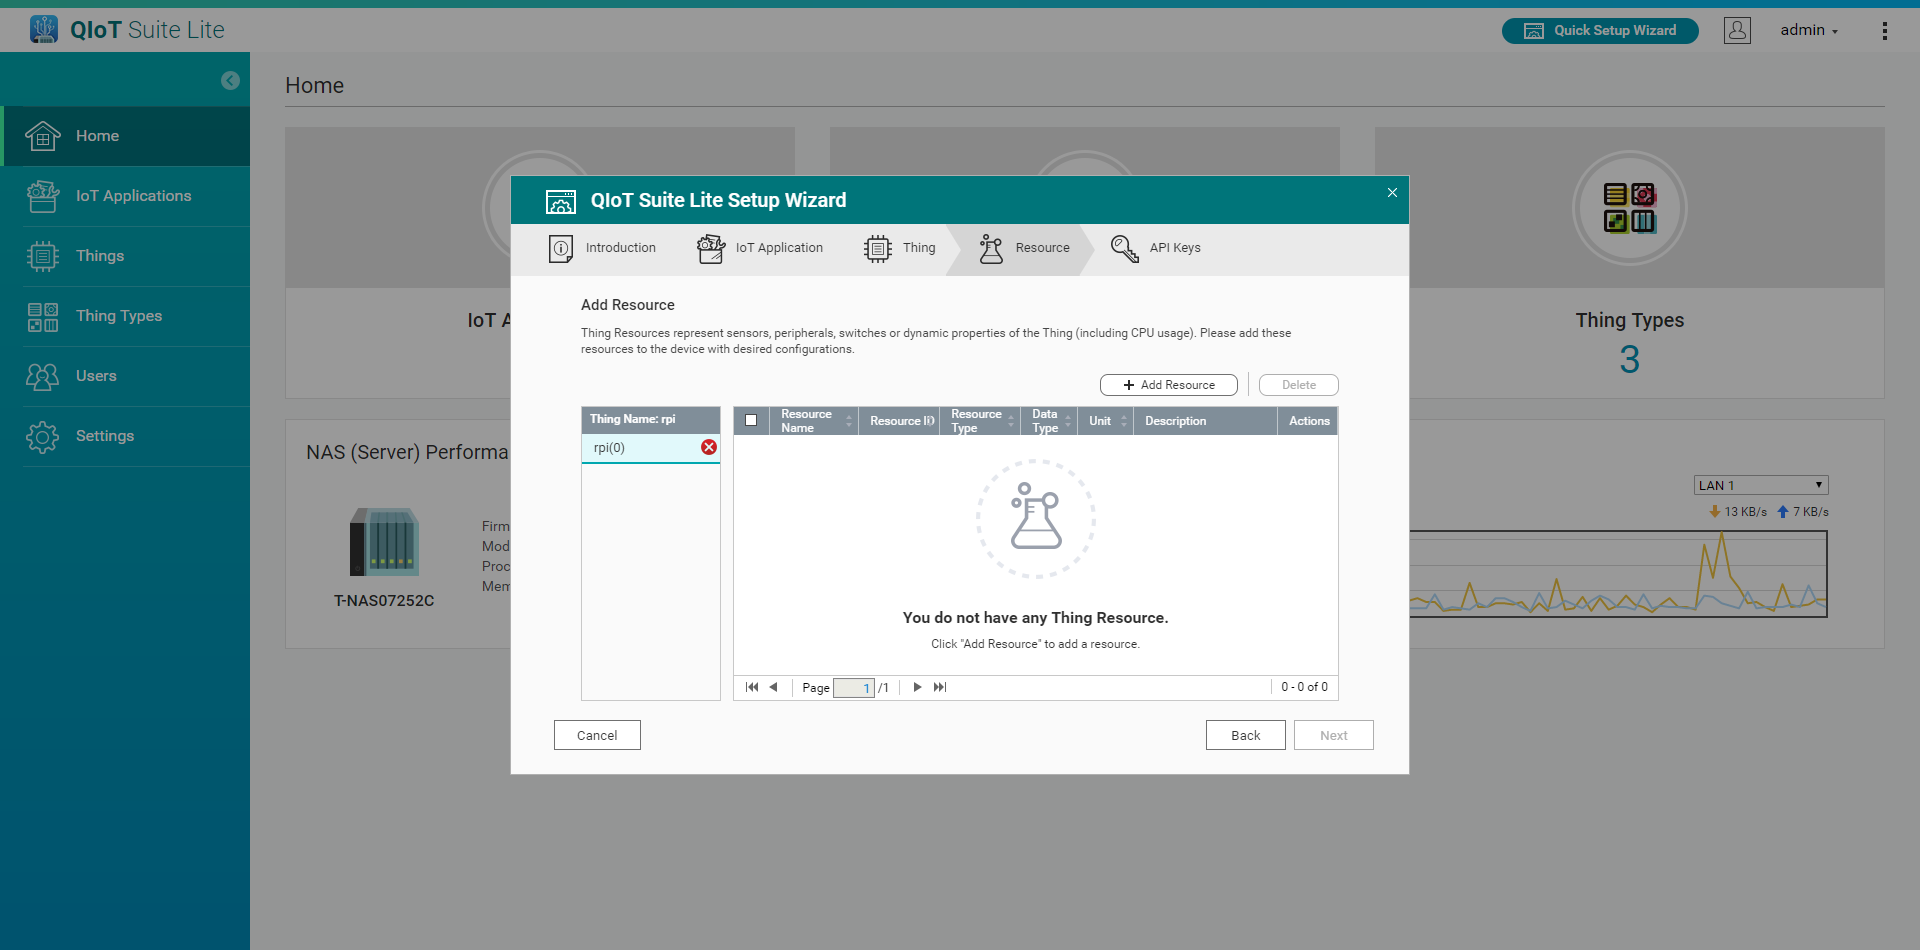
Step 4: Add Resource
Thing Resource refers to the sensors, peripherals, switches, or other data channels or states that need to be transmitted or received. Adding a Resource means creating the data channel ID (MQTT → topic, HTTP and CoAP → URL) to connect with the QIoT Add these Resources to your device and set up according to your needs.
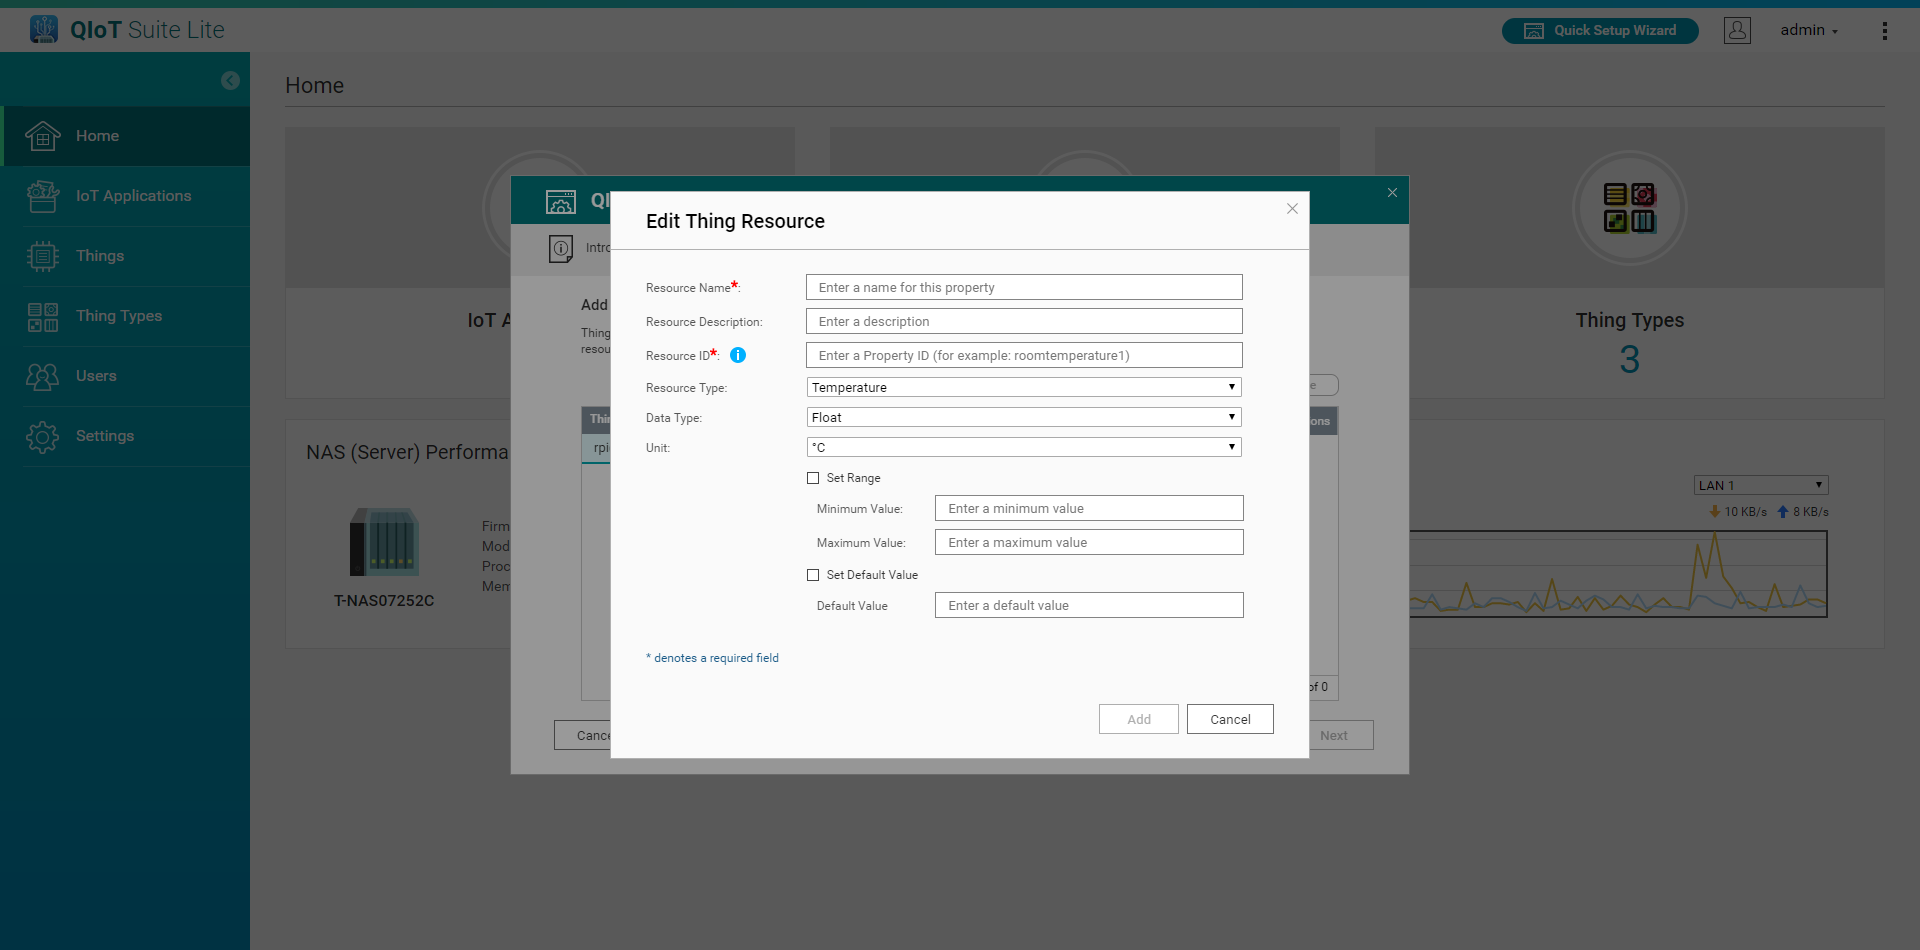
- Resource Name: Enter the Resource name
- Resource Description: Enter the Resource Description
- Resource ID: Enter the Resource ID (Note: This Resource ID will be used to create a Topic in QIoT Broker. The ID must be unique and the same device can not have a duplicate ID. The corresponding sample code or in-house developed code can only be transmitted after entering the corresponding ID. See the description in the sample code and the linked file Resourceinfo.json)
- Resource Type: Select the Resource type
- Data Type: Select the data type to be sent or received by the Resource
- Unit: Select the data unit
- Set the range (maximum and minimum) and default value

Step 5: Add API Key (optional)
Add an API Key in this step for third-party applications to access the QIoT API. To embed QIoT dashboard gadget on a web page, you can use an API Key.

Step 6: Once added, the sample code, device configurations, connection data and SSL certificate key will be transmitted to the device. Upon successful transmission, the upload path will be displayed. You can find the sample code, connection data and SSL certificate key through this path.
